
Team, users, invitations and roles
How to invite people, change their role and department, limit their facilities, remove users and manage roles.
Organisation admins and people with user-management permission can invite colleagues, decide what they can see and do through roles, and organise them into departments.
Where to find it
Settings (bottom of the sidebar), then in the General section:
Users — everyone in the organisation and pending invitations.
Roles — what each role can access.
Departments — teams such as Housekeeping or Engineering.
User Groups — groups of people that share roles.
You only see these if your role allows it.
How to invite someone
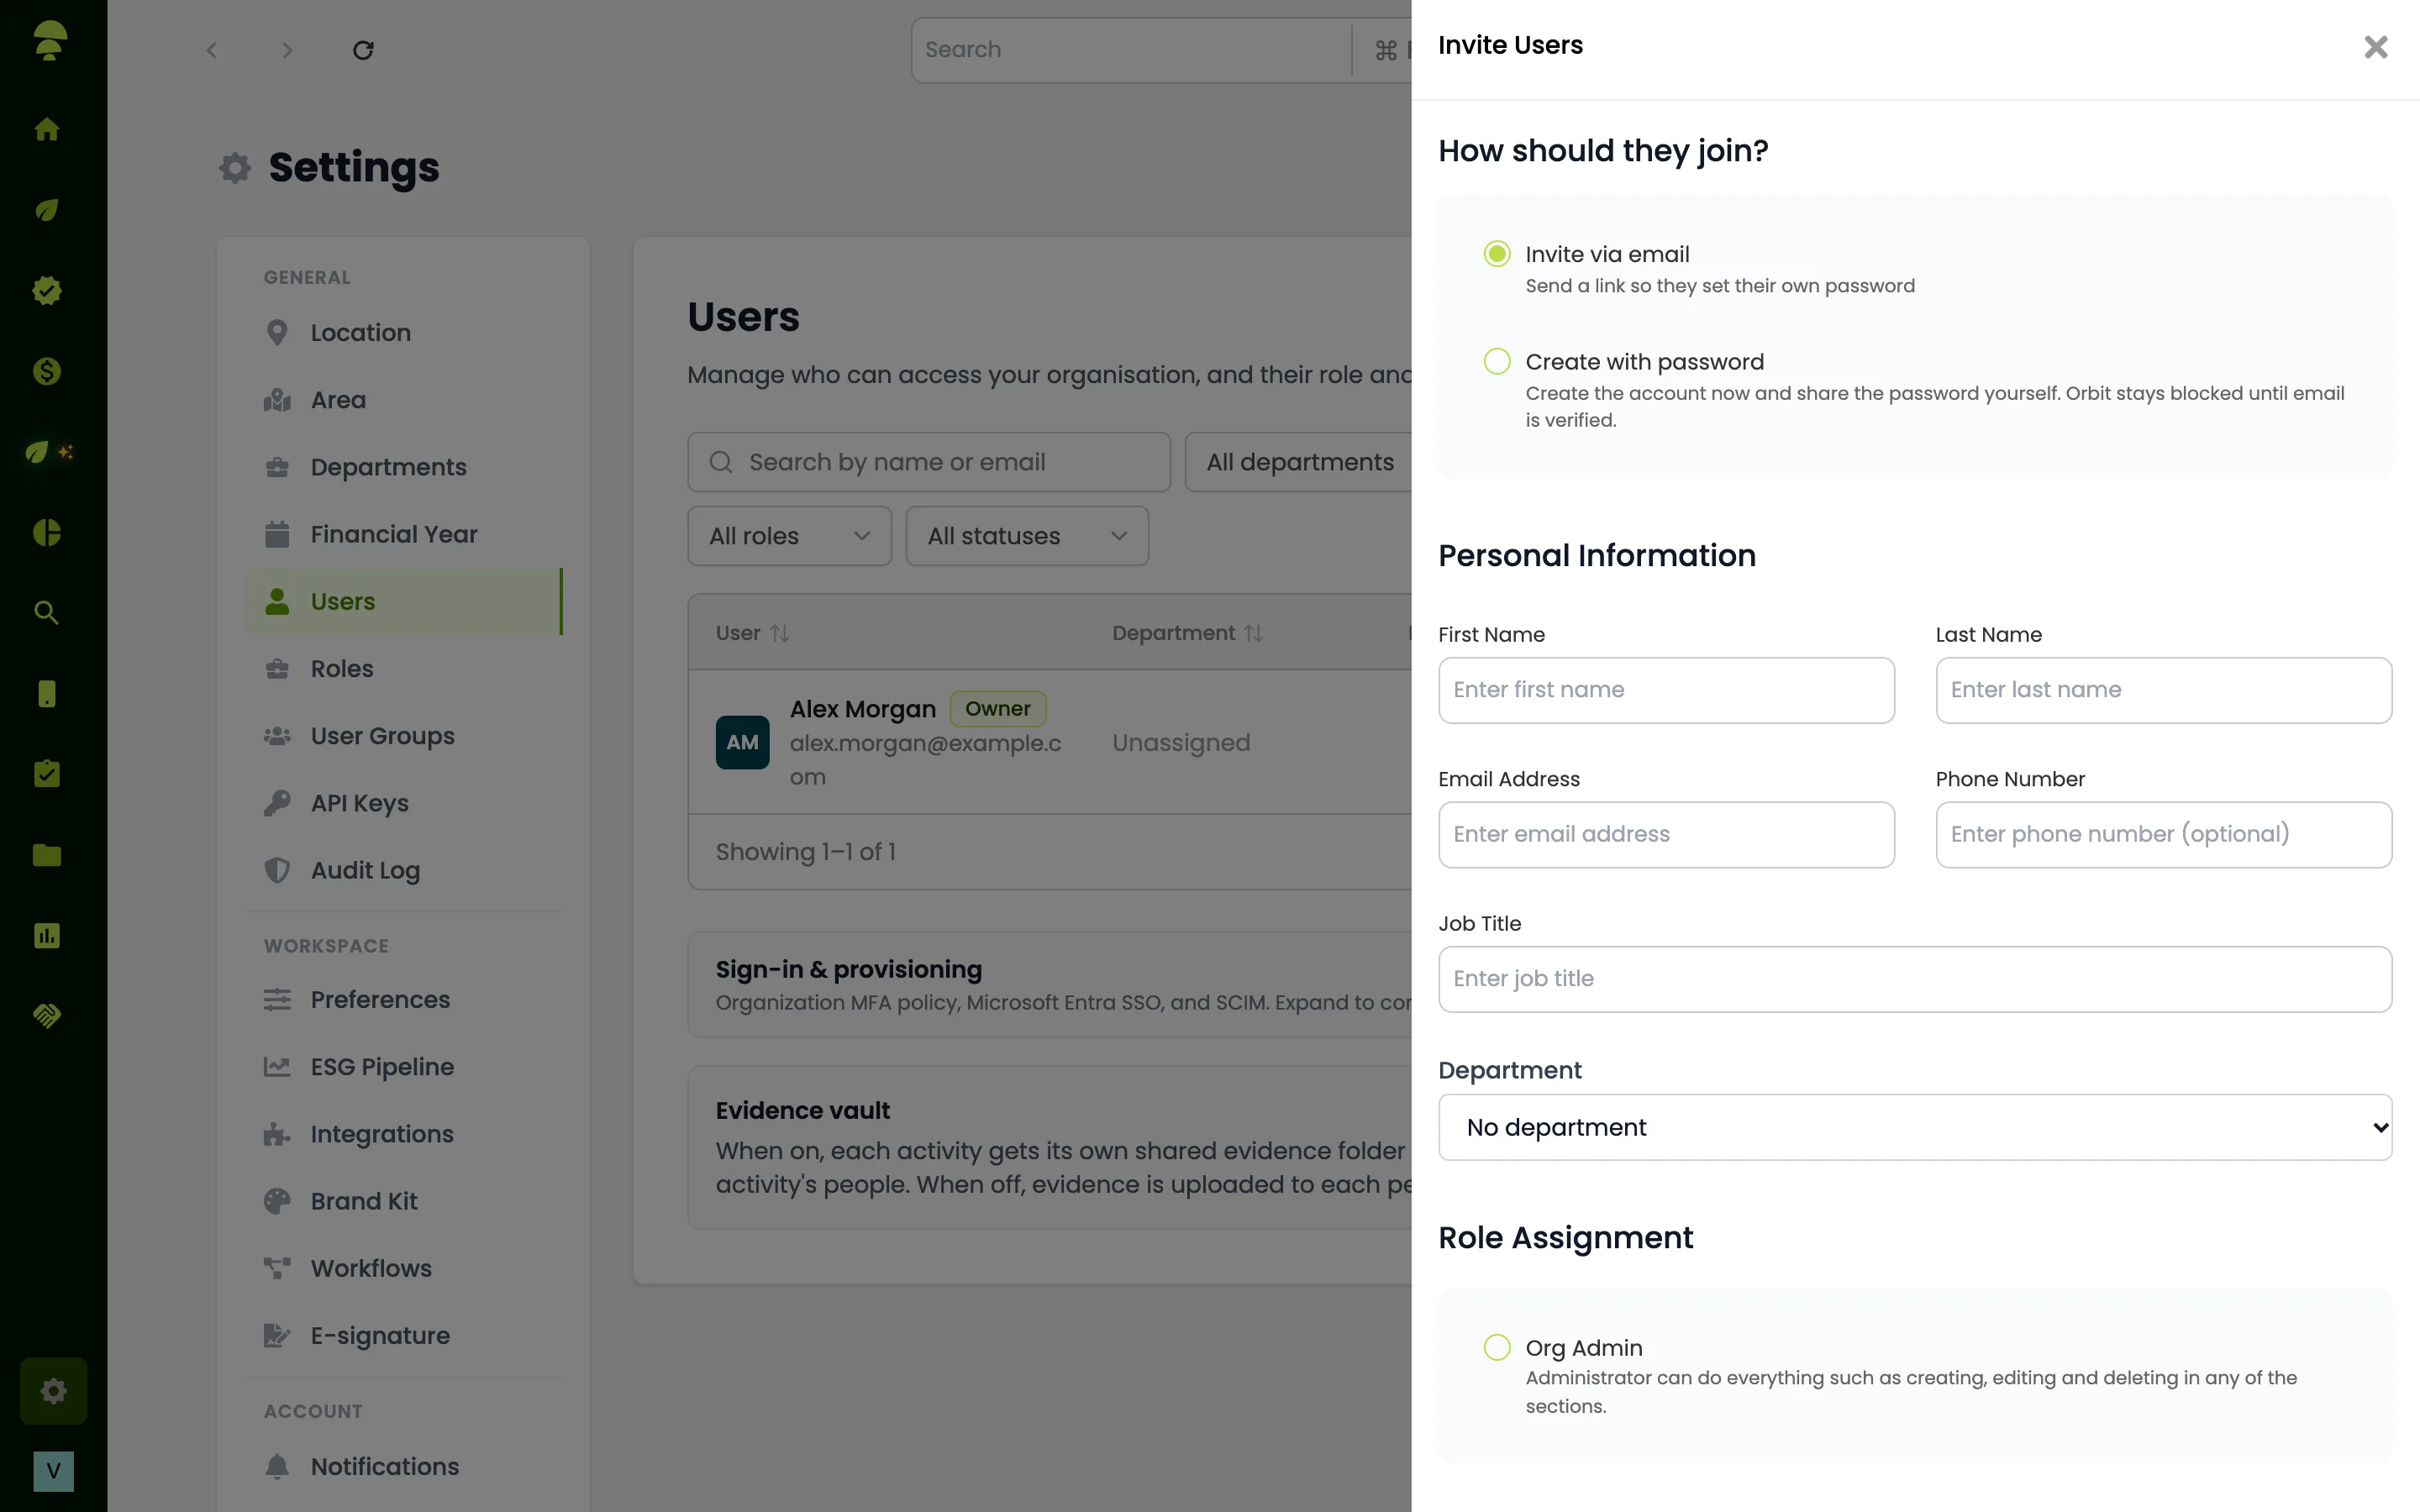
Go to Settings → Users and select Invite people.
Under How should they join?, choose:
Invite via email — sends a link so they set their own password.
Create with password — creates the account now and you share the password yourself.
Fill in First Name, Last Name, Email Address and, optionally, Phone Number and Job Title.
Choose a role under Role Assignment, and a Department if you use them.
Tick Make this user an organisation admin only if they should manage the whole organisation.
Optionally add a Custom Message, then select Send Invite (or Create User).
The person appears in the list with the status Invited until they accept.
How to resend or cancel an invitation
In Settings → Users, find the person:
Select Resend invite to send the email again.
Select Revoke invite, then confirm, to cancel it.
How to change someone's role or department
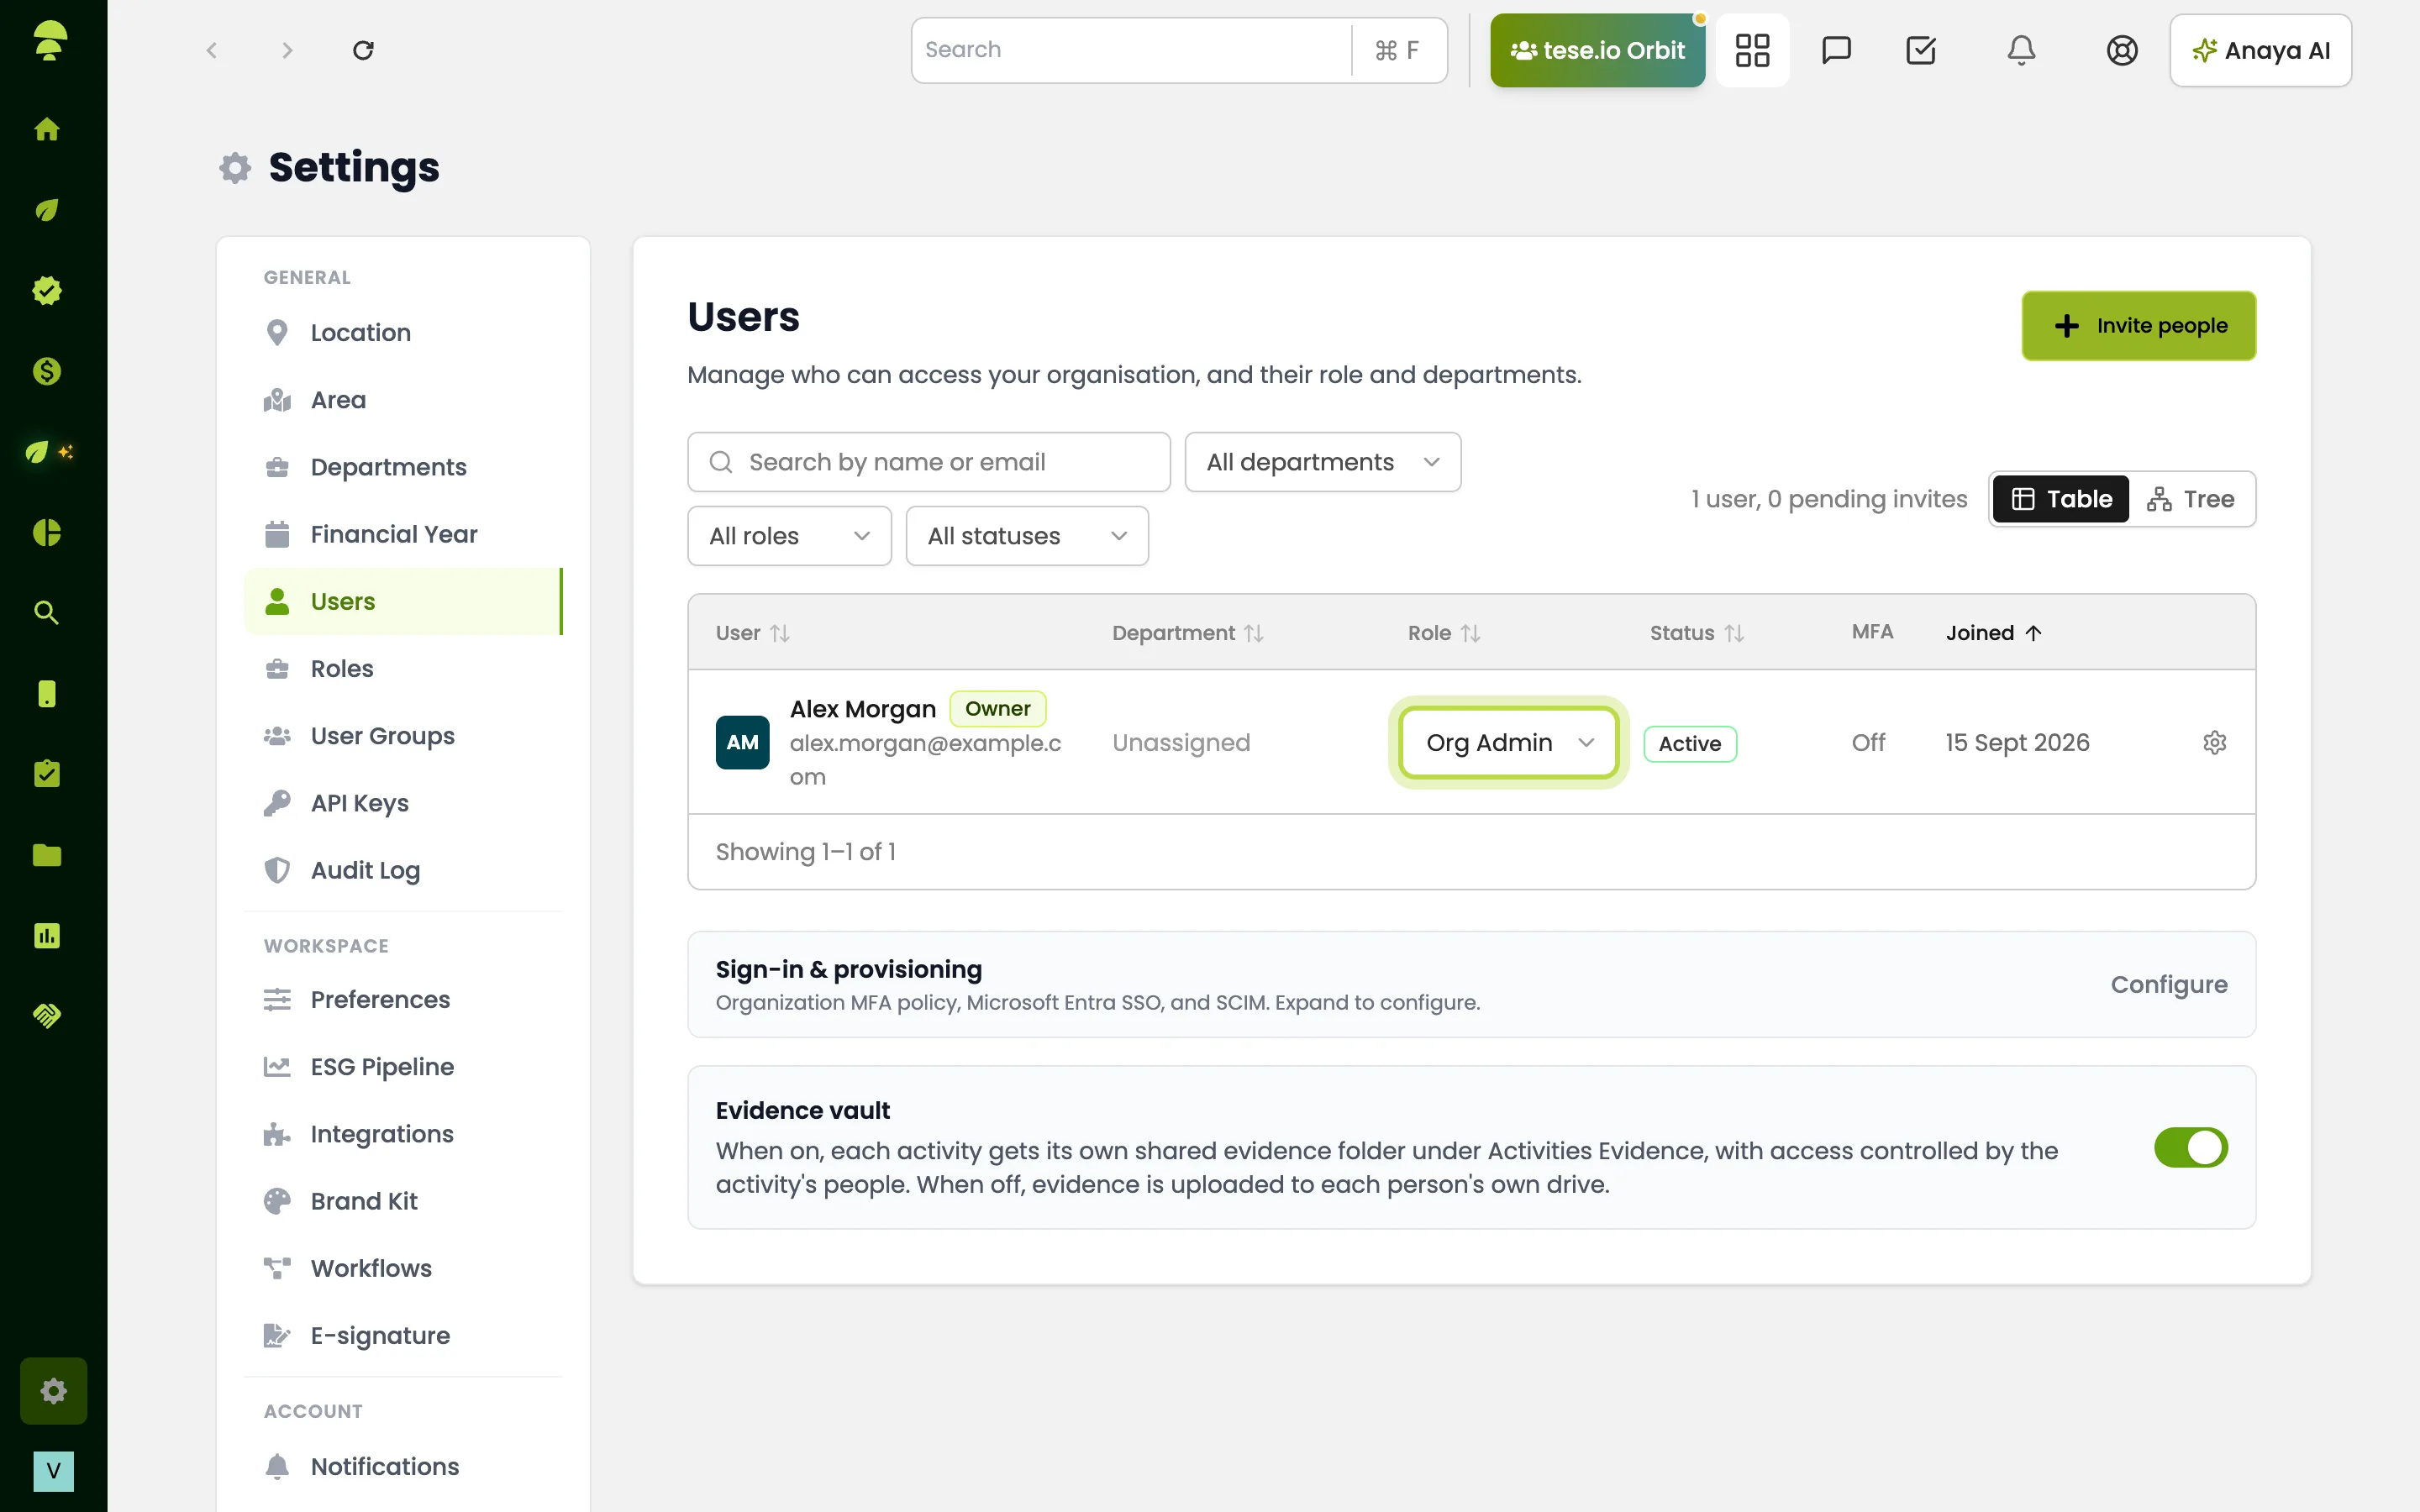
In Settings → Users, find the person. Use Search by name or email or the role, department and status filters.
Choose a new role from the drop-down in the Role column.
To change departments, select Edit departments next to their department.
How to limit facilities or remove a user
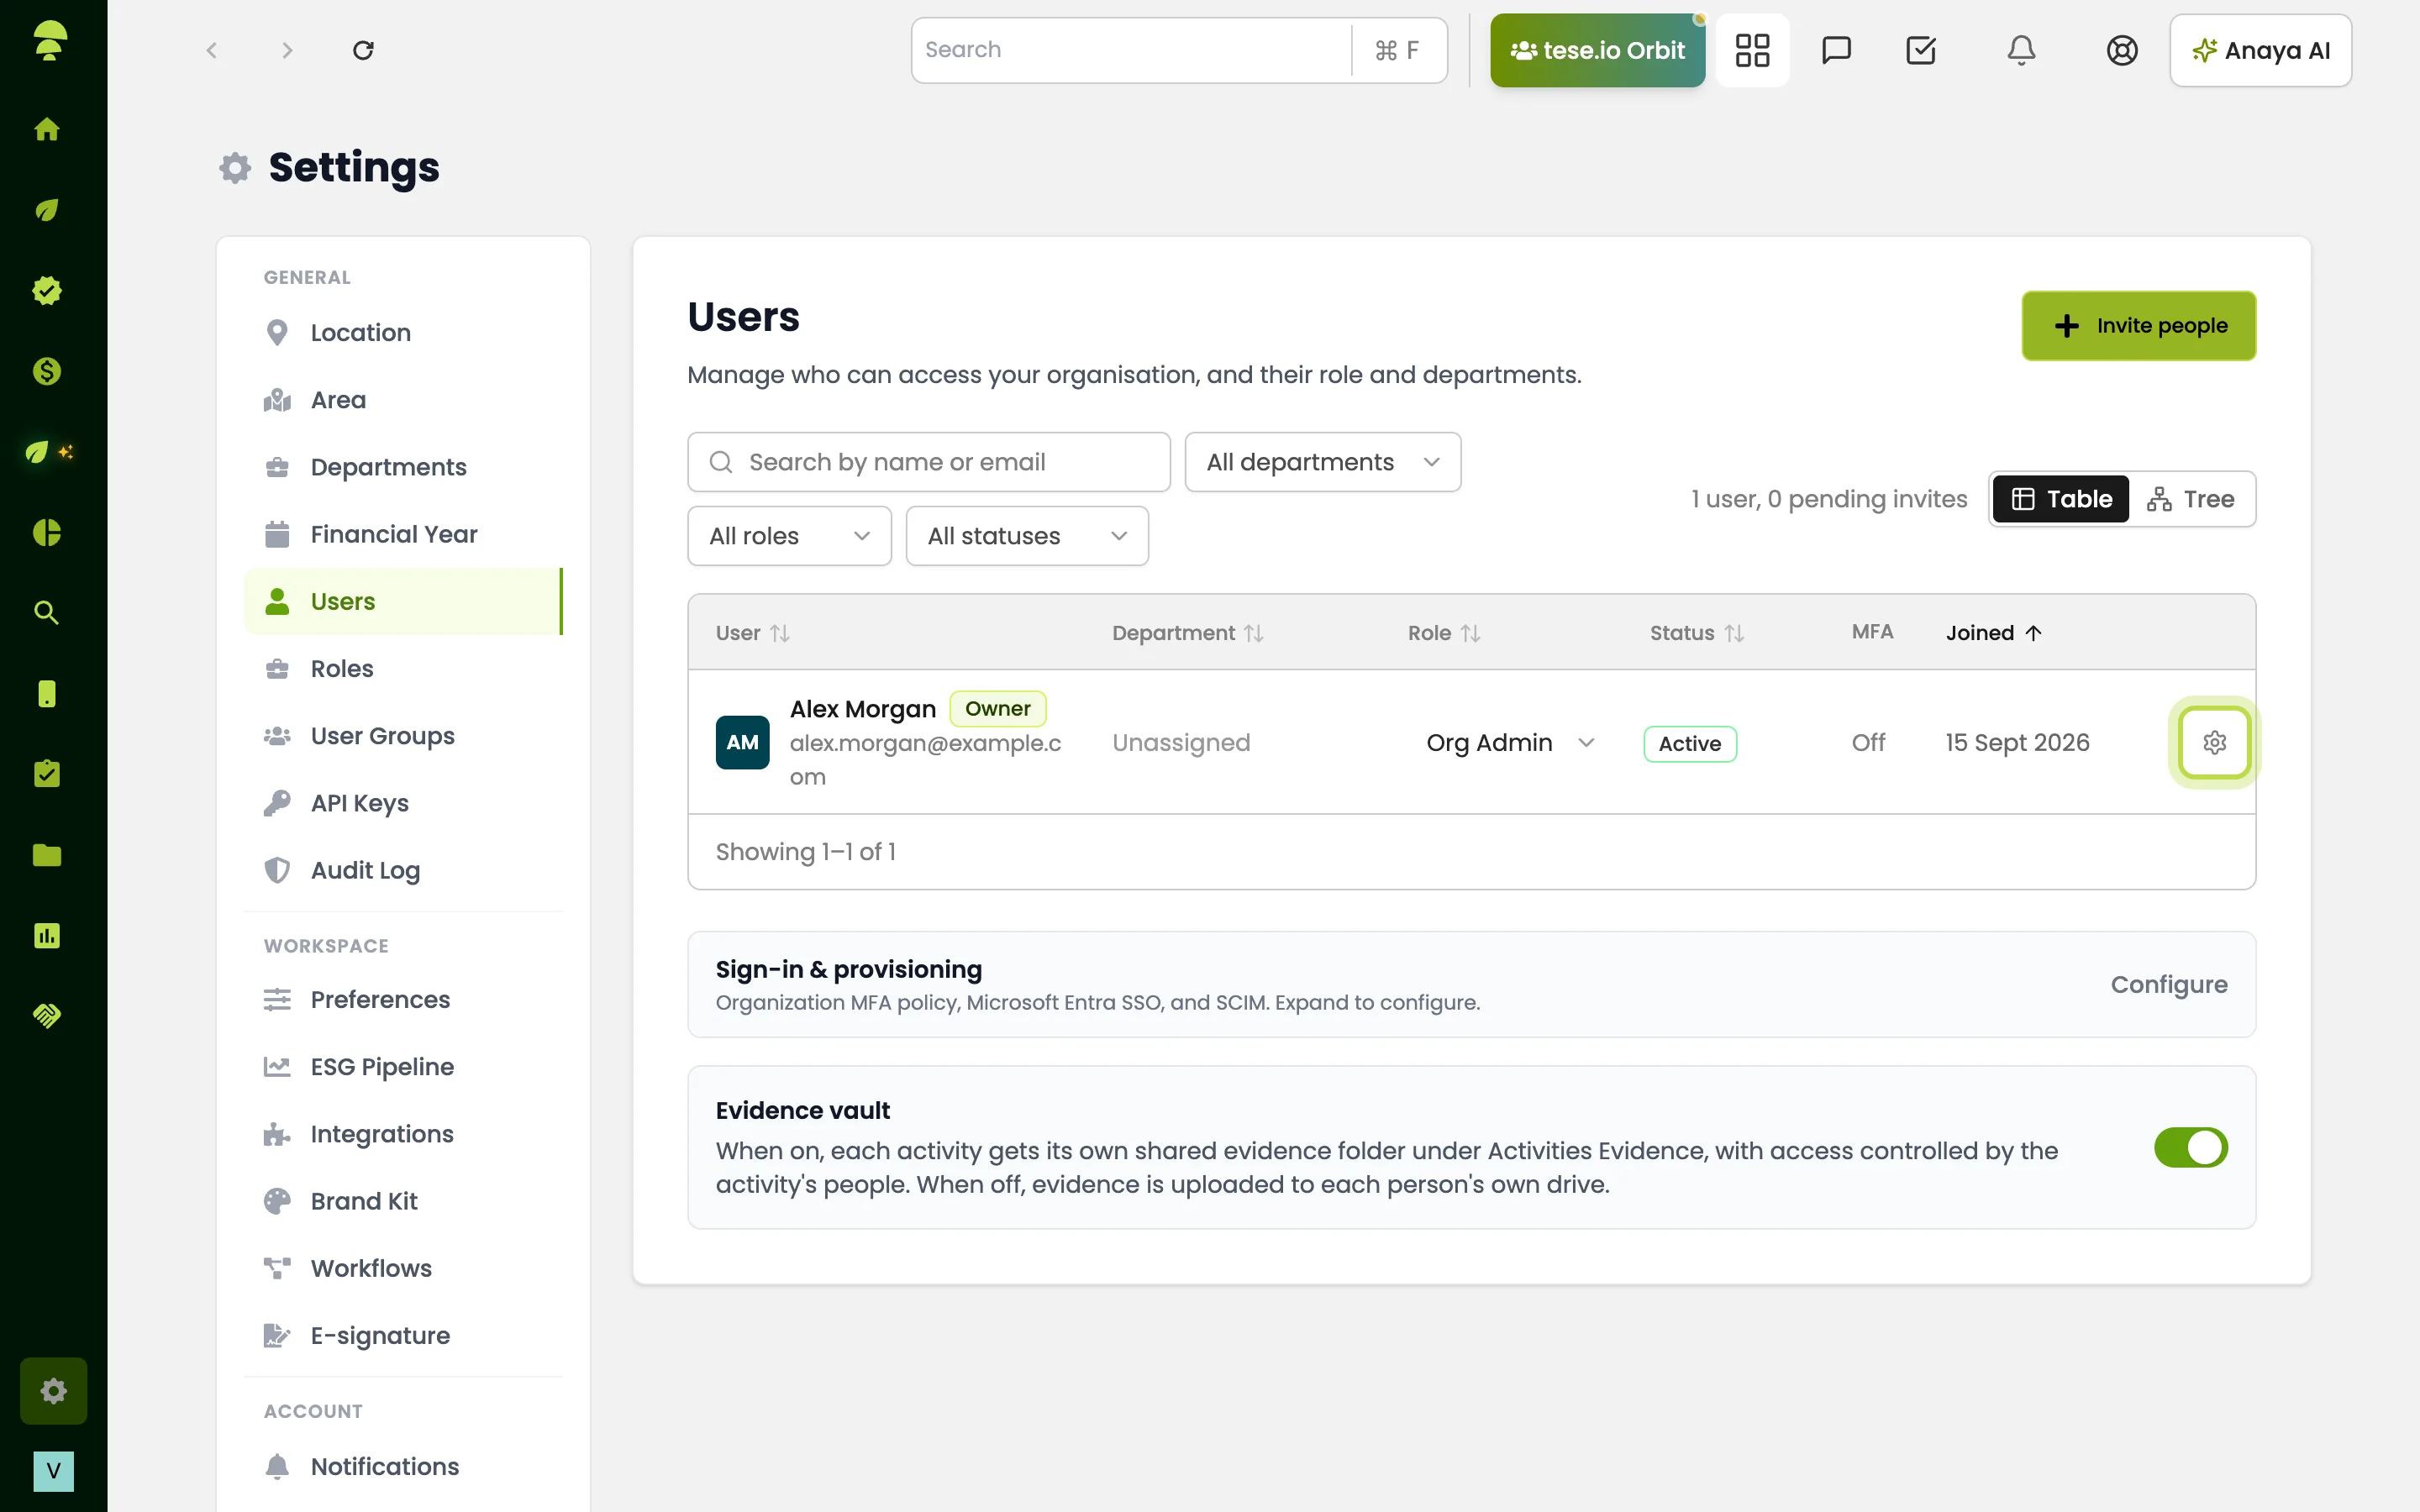
In Settings → Users, select Manage access (gear icon) on the person's row.
Under Facility access, choose which locations they can work with, then Save.
To remove them from the organisation, select Delete user.
Organisation admins can also turn MFA on or off for a member here.
How to create or edit a role
Go to Settings → Roles and select Create Roles.
Enter a Role Name and Role Description. You can Start from a template.
Under Module Access, choose the parts of tese.io this role can use. Use the advanced permissions for finer control.
Select Create Role.
To change a role later, select Edit permissions on its row, make your changes and select Update Role. Delete role removes it.
Good to know
The organisation admin is shown with an Owner badge.
Changing a role changes what someone sees in the sidebar and which buttons they get.
Under Sign-in & provisioning, admins can require MFA for everyone (Require MFA for all users) and set up single sign-on.
Departments can be archived and restored under Settings → Departments, using New department, Archive and Restore.
Only organisation admins can create, edit or delete user groups.
Common questions
Why can't I see Settings → Users? Your role doesn't include user management. Ask an organisation admin.
Someone says they never got the invite. What do I do? Check the email address, then select Resend invite. Ask them to look in spam too.
The invitation link says it's invalid or expired. What now? Revoke the old invite and send a new one.
Can I give someone access to only some sites? Yes. Use Manage access → Facility access for that user.
Why does the list say "Your role doesn't include permission to view users."? You can open Settings but not the user list. An organisation admin needs to grant the permission.
Was this article helpful?
Still need help?
The tese.io team reads every message and usually replies within one working day.
Contact support